Champagne Cupcakes

I was never much of a Champagne drinker.  Maybe it was a bit too refined for my palette.  Then it all changed.  One night my hubby took me to dinner at a beautiful restaurant here in Northern Virginia.  Before ordering our food the waiter asked if we would like something from the “champagne cart”.  Well, this I had to see!  As he glided over what looked like a massive silver ice bucket filled with several bottles of bubbly I was hooked.  Yes, before I even had a sip.   I chose a rose varietal and, surprise, surprise – it was delicious!

For a fellow Champagne lover’s birthday I created these champagne cupcakes.  Meant to look like tiny ice buckets filled with ice and/or bubbles and a bottle of champagne.

3BtYvo


DSC_0113

JT are the birthday girl’s initials

DSC_0119

Cheers!


Girl Scout Cookie Recipes

It’s cookie time in our house and as the (1st annual) cookie mom for Avery’s troop I have been swallowed up by our troop’s cookies.  Luckily, the parents have collected their orders, so I am only left with our cookies and extras for booth sales.  Still, I have lots of cookies hanging out.  So, I decided to find ideas to put all of these cookies to good use.  Because a dessert in itself isn’t enough, I need to find a creative way to double the goodness (and calories) by making it into a delicious dessert mutation.

For Valentine’s Day I decided to make the kids’ teachers some fudge.  I added broken pieces of Dulce de Leche cookies to spice things up.  Now, I couldn’t just take their word for it, so I tried a piece (or 6) myself.  Delicious!  The recipe is super simple, too:

  • 1 bag chocolate chips (I used milk chocolate, but you can also use semi-sweet)
  • 1 14 oz. can sweetened condensed milk
  • 12 Dulce de Leche cookies
  • 1/4 c caramel sauce (you can make your own, but to save time I used store bought)

Melt chocolate chips and condensed milk in a saucepan on low.  Careful not to let the chocolate get too hot!  This only takes a couple of minutes.  Break apart the cookies into pieces.  I like the pieces a little bigger, not completely crumbled, but that’s a personal decision.  Fold the broken cookies into the chocolate mixture.  Line a 9 x 9 brownie pan with parchment paper, then spray with cooking spray.  Pour chocolate mixture into pan.  Now, pour the caramel sauce over the chocolate in waves and swirl through with a fork or toothpick.  Pop in the fridge and your fudge will be ready in about an hour.


This week I am making a birthday cake for a friend. I am using a flourless chocolate cake recipe and I’m planning to add Tag Alongs (her favorite) throughout.  I’ll let you know how that goes.  Until then, here is some inspiration for all of your leftover cookies!

cookiefudge

Fudge made with Samoas

samoa fudge

More yummy samoa fudge

tagalongtrifles

Trifles made with peanut butter and Tag Alongs

thinminttruffles

Thin Mint Truffles – these look similar to truffles my friend makes with Oreos. They are addictive!


Tutorial: How to make a fondant elephant

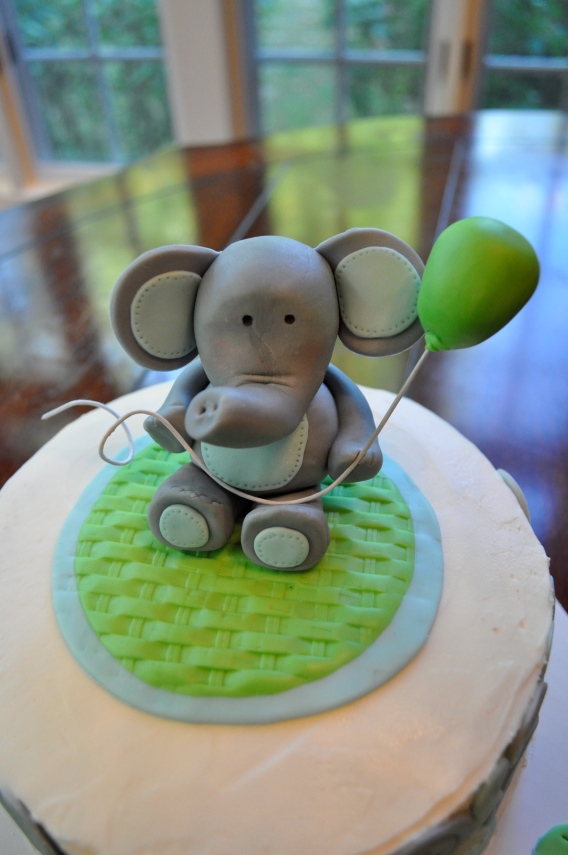
I have made these cute little elephants for a few cakes in the past and everyone seems to love them.  As it turns out they are relatively simple to create.  If you aren’t used to working with fondant, think of it like play-doh, except it’s more expensive and tastes better.  Well, a little better 😉

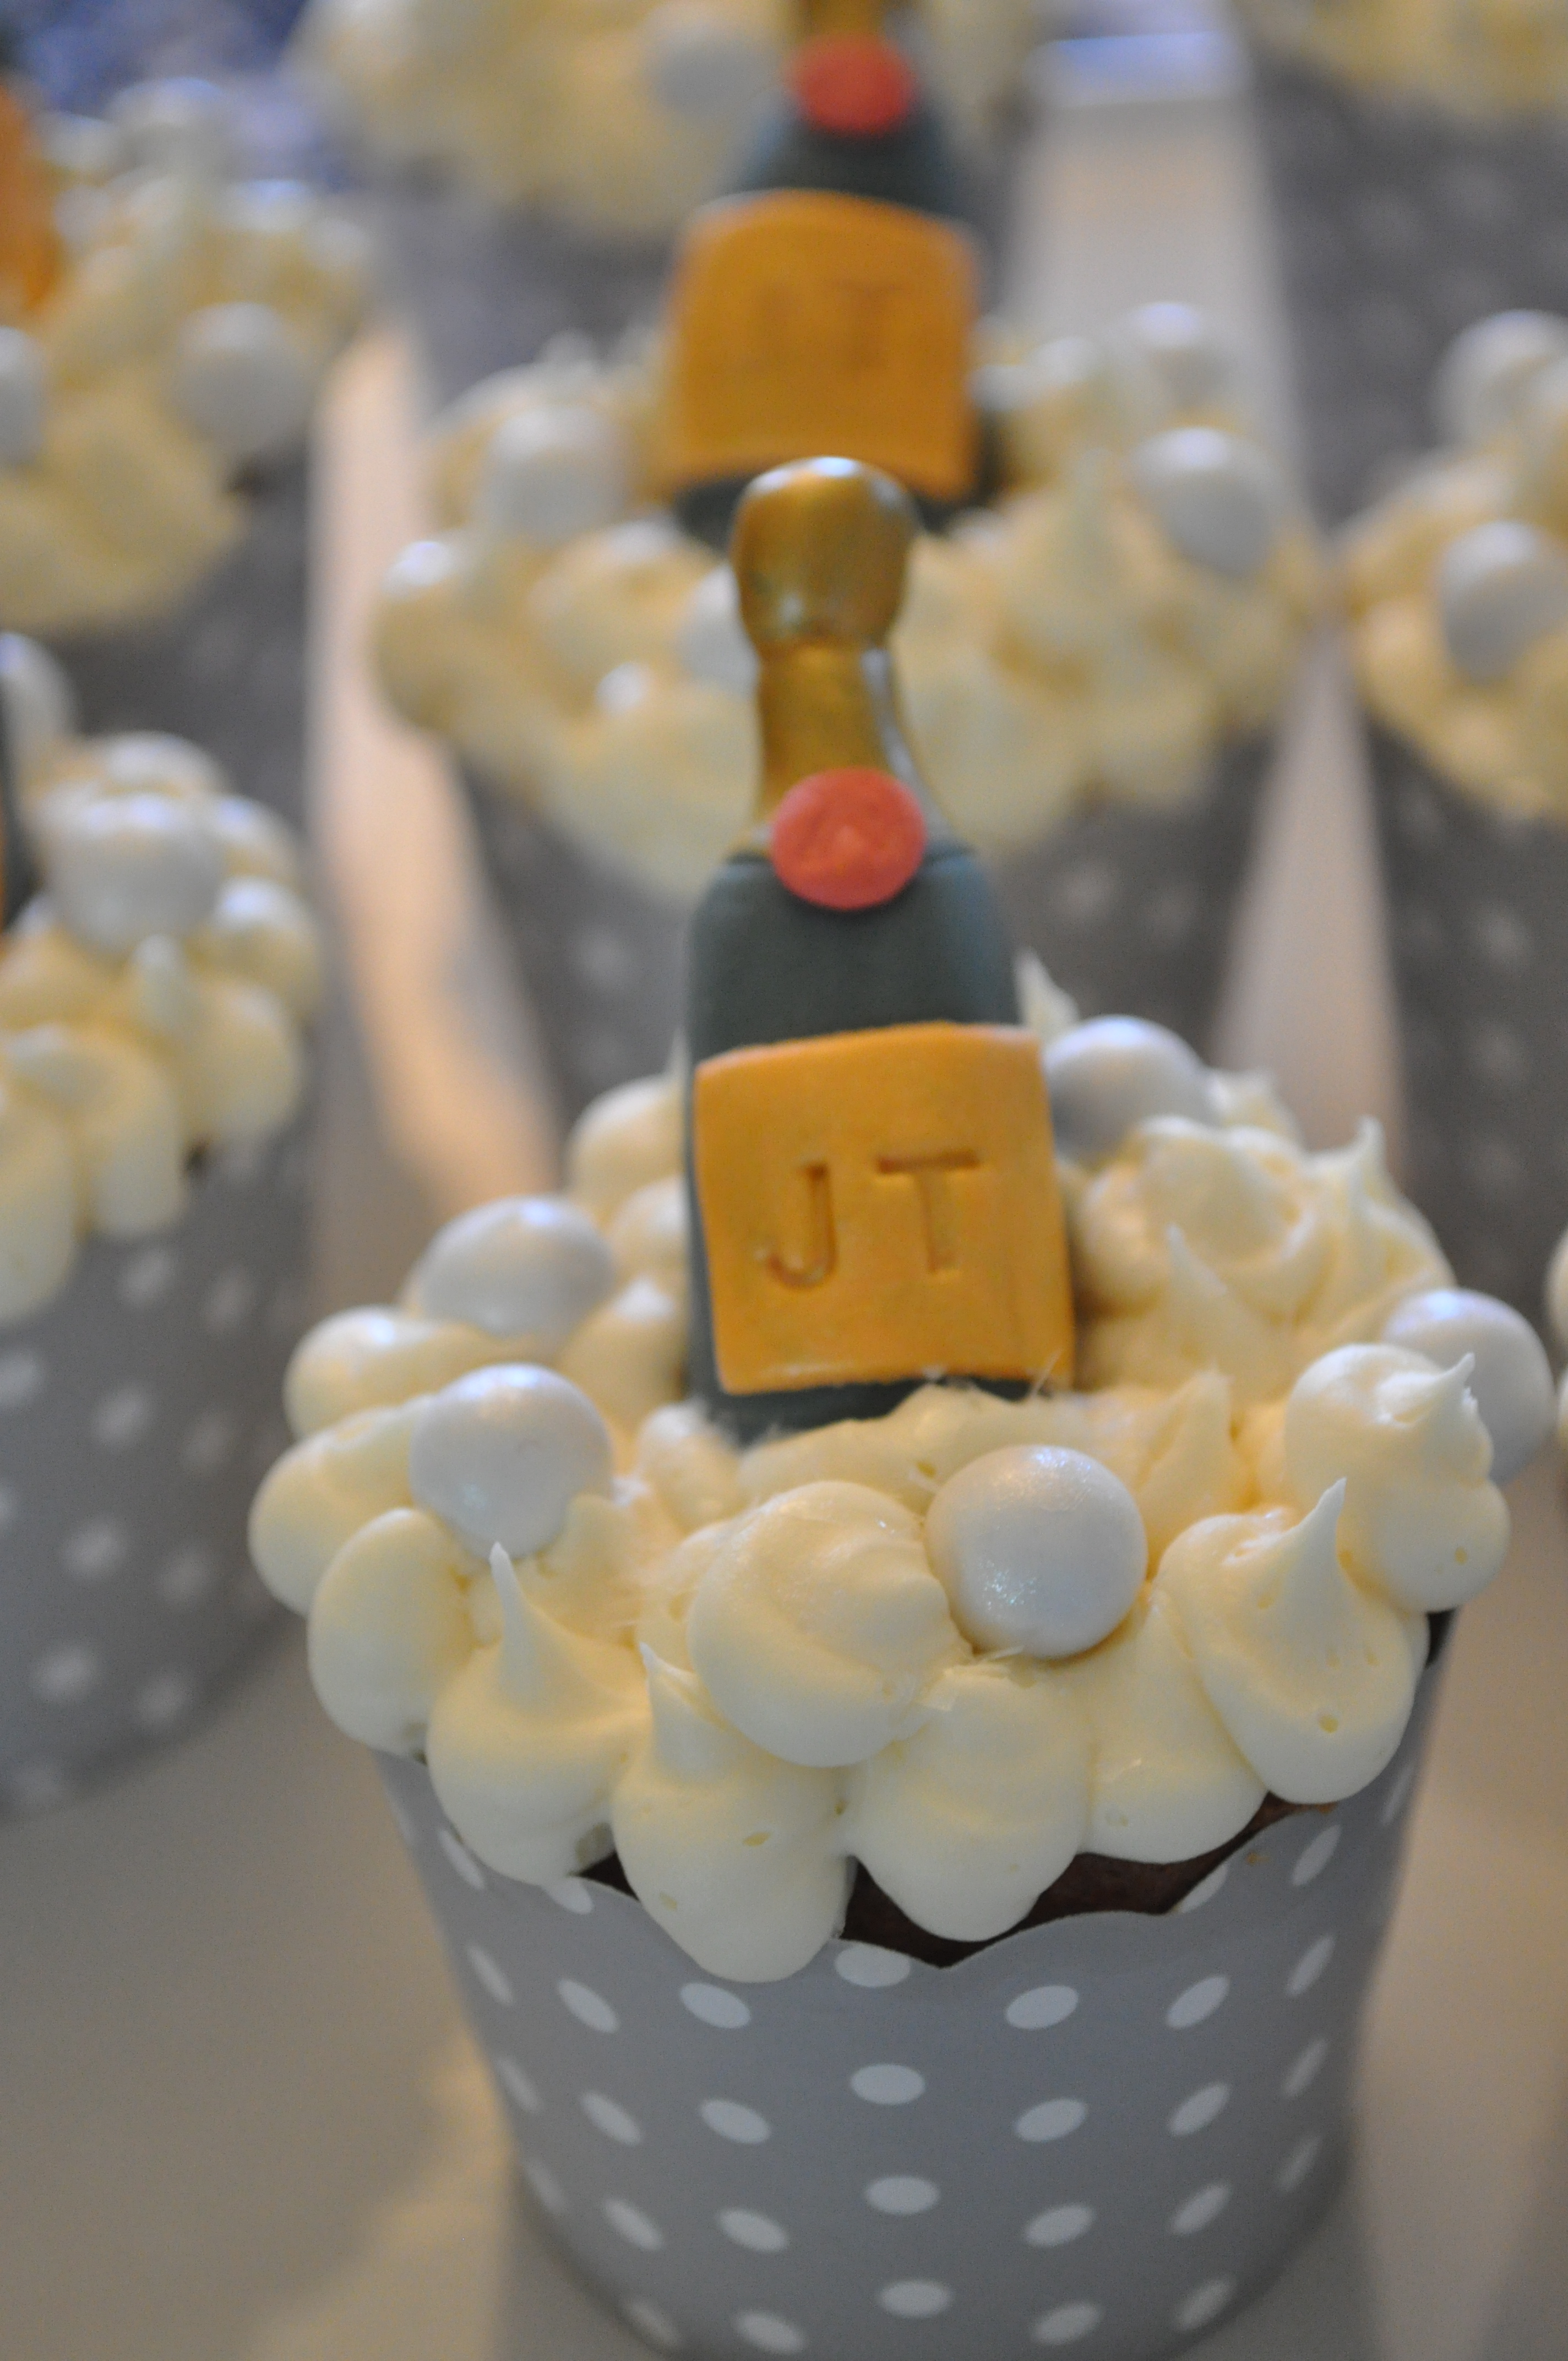
Some elephant cakes:

ImageImage

Image

For the tutorial I decided to make a girly elephant in pink and green.

DSC_0069

Start with a large ball of pink fondant and small amount of green fondant.  I use about a 2/3 fondant to 1/3 gum paste ratio.  This makes it easy to mold, but will also dry hard.

DSC_0073

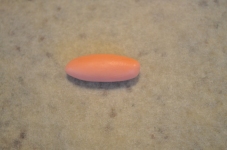
Shape the body into an egg and insert a piece of spaghetti.  I used bucatini which is hollow and sturdier and most importantly, I had it in my pantry.

DSC_0072

Stick the body onto some styrofoam or an egg carton to dry while you are working on the other parts.

DSC_0074

For the head, make a ball out of some of the remaining pink fondant – Don’t forget to save some for the arms, legs, and ears.

DSC_0075  DSC_0076

Roll down half of the ball with your fingers to create an oblong shape.  Then, continue to shape the stretched piece until it resembles an elephant’s head with trunk.

DSC_0077 DSC_0078

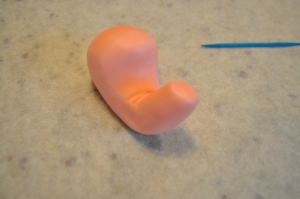
Use a toothpick to make creases where the trunk curves up.  It’s the details that make the elephant!

DSC_0082DSC_0083DSC_0084

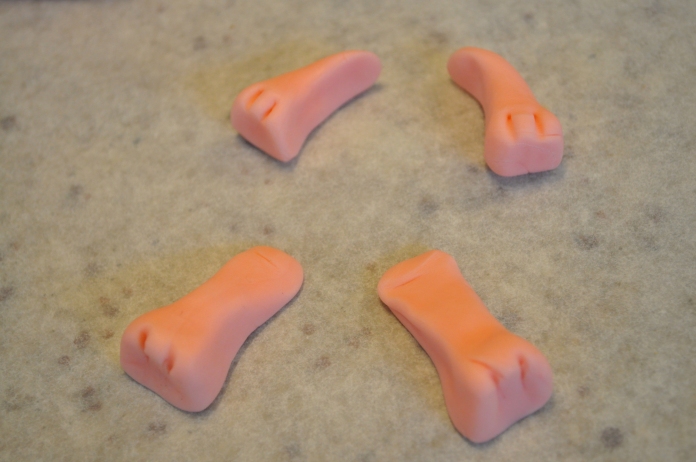
For the arms:  Roll a piece of fondant into a little log.  Press onto the end of one to create a larger, flat side.  Using a toothpick, press into the flat side to make toes.  Finally, curve the skinny side so you can apply it to the elephant’s body.

For the legs:  follow the same procedures, but instead of curving the skinny side, flatten it, since it will be sitting under the body.

DSC_0086

DSC_0087DSC_0088

Angle the legs and dab a little water on the skinny ends.  Set the body on top and support the back with a bowl or other firm object.

DSC_0091DSC_0092DSC_0093

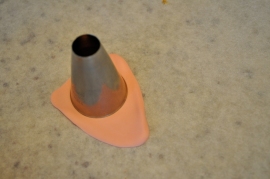
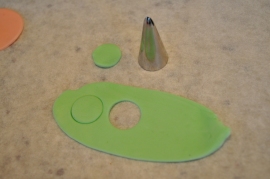
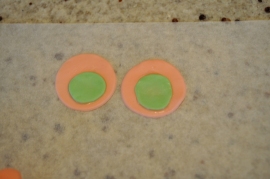
Using a large piping tip (or whatever round cutter you can find) cut out pink circles for the ears and smaller green inserts.  Add a dab of water to the pink and press the smaller circle on top.  Here they’re looking a little like green eggs….

I want this elephant to look like a stuffed animal, so I added dots around the green circles with a toothpick to look like stitches.

DSC_0094

Using a bit of water, attach the ears to either side of the head.

DSC_0095DSC_0096

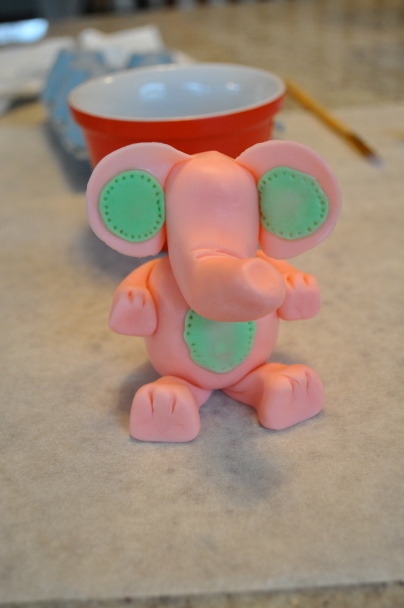
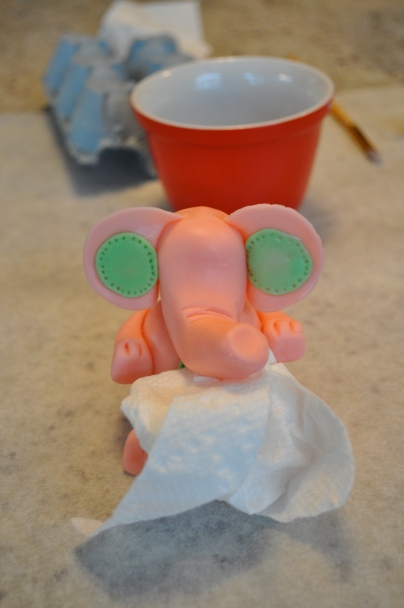
Attach the head to the body on top of the dry spaghetti noodle.  If the trunk or ears start to flop, use a paper towel to support them until they are dry.  This shouldn’t take more than an hour or so.

DSC_0099

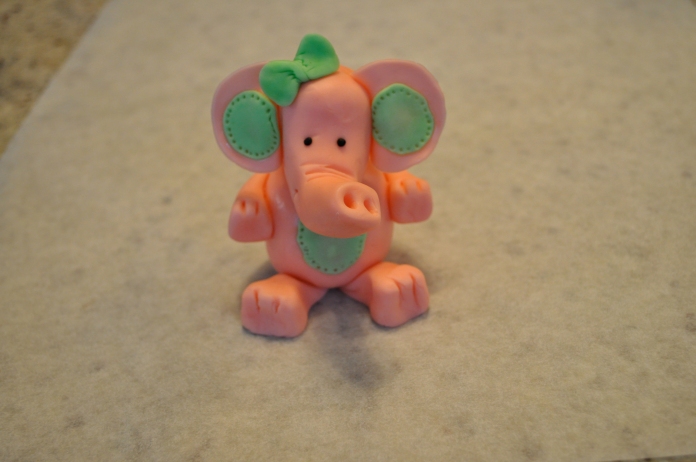
Finally, add some nostrils to the trunk, little, tiny black fondant balls for eyes and a cute green bow.

DSC_0100

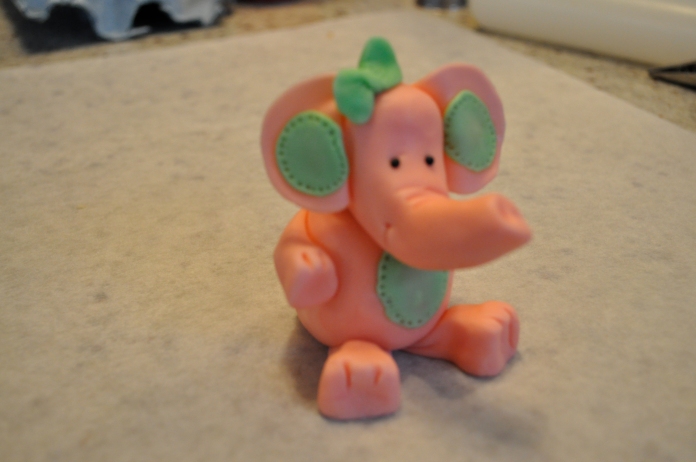
Don’t forget the side smile!

Yummy Chocolate Bark

It seems like this year (and every year, for that matter) there are so many people I want to say “Thank you” to around the holidays.  There are, of course, the kids’ teachers.  Then, their wonderful religious education teachers.  Can’t forget Avery’s swim coach who has been so amazing with her as she finds her place on this new team.   Our great bus driver, my ally in the front office at school……the list goes on and on.  So, what can you give everyone without breaking the bank?  Here’s what I came up with this year:

toffee and butterscotch bark

Toffee and Butterscotch Chocolate Bark

makes 2 servings

4 oz. (1/3 bag) of Ghiradelli milk chocolate chips

4 oz. (1/3 bag) of Ghiradelli semi-sweet chocolate chips

3 oz (1/4 bag) of Nestle butterscotch chips

1/4 cup  Heath toffee chips

1/4 cup pecan pieces

Heat chocolate chips together in a bowl over a pot of steaming water.  Mix until combined and all chocolate is melted.

DSC_0004

Add in toffee and pecan pieces.  You can also add these in after you have poured the chocolate, but I prefer to incorporate my ingredients so it comes out more like a candy bar.

DSC_0006

To create a “bark” effect, I found this great texture mat online that imprints a wood design onto the chocolate.  I have several different ones that I use for fondant and this one was perfect for my chocolate bark.

Plastic Texture Mat

DSC_0017

Using a silicone spatula, spread chocolate mixture over the texture mat.

Heat butterscotch chips in a microwave-safe bowl for about 25 – 30 sec.  Spoon mixture into a plastic bag and cut off the tip of one end.  *Make sure the butterscotch is not too hot or it will melt the bag.

DSC_0021DSC_0022DSC_0023DSC_0024

Squeeze the butterscotch in a zig-zag pattern over the chocolate.  Then, take a skewer and pull lines through the zig-zag to make a swirled effect.

Place mat in the freezer for about 30 minutes until hardened.

Break apart pieces of bark and place in a clear favor bag.

DSC_0037

**I made the chocolate bark exactly as I would like it, but you can always mix up the ingredients so it is specific to your tastes.

Now, for the coffee.  I bought $5 gift cards at Starbucks and asked for empty Venti (iced) cups with lids.  I wrapped the chocolate bark in brown tissue paper, added the gift card, topped with white tissue paper, a pretty straw, and gift tag.

Total Cost:  approx. $7

DSC_0054

Easy Holiday Lighting

This is our second Christmas in the new house and I still haven’t mustered up the courage to dive into outdoor Christmas lights.  I just know it will take forever and then come January 1 I will be cursing having ever put them up in the first place.   That said, I love holiday lights.  It makes me feel all warm and fuzzy.  So, I tried to think up a way to get around all the work, but still get into the season.   I realize I sound pretty lazy, but at least I’m owning up to it.

So, I trotted down to my local Michael’s store (for probably the 4th time this week) and purchased a roll of red cellophane and a roll of green cellophane.   I cut out squares that were large enough to fit over each of my outdoor up-lights.  I covered each light with cellophane and held it on with a rubber band, alternating colors as I went.

DSC_0031

I’m sure they make a film for outdoor lights that they sell online somewhere, but for approx. $6 in supplies and a 10 min. process I am happy with the results.   You could do the same for those plug in lights that shine up on your house, too.  *Note*:  Our lights are LED, so they don’t get hot at all.  If you have regular voltage lights, you might want to make sure they don’t get too hot or you could melt the cellophone.

DSC_0028


DSC_0023

Thanksgiving Treat

Awhile ago I posted some ideas for fall treats.  With the kids’ Thanksgiving Feast at school coming up I decided to recreate the mini cornucopia.  They were just too cute to pass up!  Now, what to put inside?  A few weeks ago I was at a friend’s house and she made these delicious butterscotch and chocolate, for lack of a better word – cookies.  Basically, they were chow mein noodles mixed with peanuts, melted chocolate, and melted butterscotch chips.  Since we have so many peanut allergies at our school I thought it best to revise the recipe for the kids’ classes.

So, I’m thinking a twist on the “puppy chow” mix I usually make around Christmas.  We’ll call this one, Thanksgiving Grub.  Butterscotch (instead of peanut butter) and chocolate mixed with Corn Chex, add some Rice Krispies and M&Ms.  Reese’s Pieces would be better for fall colors, but we are considering our nut-free friends.   I haven’t made it like this before, but I never shy away from trying a new recipe.  Especially since it gives me an excuse to taste yummy desserts.  Of course, my pants don’t share in my delight since they are, as of late, being stretched to their limits.  Maybe I’ll just have a bite…….Everything in moderation, right?

For the Cornucopias, buy regular sized sugar cones.  Place 2 or 3 in a steamer basket over boiling water for approx. 1 – 2 min.  Leave the cover on while you work.

When you take the cone out it will be hot, so I used tongs to transfer from the basket to a kitchen towel.  Working quickly, mold the end of the sugar cone around your finger to form the curl of the cornucopia.


The cones cool pretty quickly, so once you are finished molding, they should stay in their new shape.

Now, to add the filling:


Thanksgiving Grub

2 cups Corn Chex

2 cups Rice Krispies

1 bag milk chocolate chips

1 bag butterscotch chips

1 medium bag Reese’s Pieces (or M&Ms)


Melt milk chocolate chips (I like Ghiradelli) and butterscotch chips in a bowl over steaming water.

Once chocolate and butterscotch are melted, remove from heat and add in Corn Chex and Rice Krispies.


Don’t worry about smashing the Chex and Rice Krispies.  It will give the mixture a variety of texture, which is good.

Now, spread the mixture out on some parchment paper to cool.  Let cool until chocolate has hardened about 1 hour.


Now, break into pieces and add M&Ms.  Fill the sugar cones and your cornucopias are complete!


Spirit Sticks


When I was in high school the cheerleaders used to throw “spirit sticks” into the crowd at football games.  The sticks consisted of toilet paper/paper towel rolls filled with cheap candy, and rolled in tin foil.   It wasn’t  much, but the excitement and surprise of opening a little gift in an unexpected place was always fun.   For Avery’s first winter swim meet I decided to revive this old tradition.

Instead of cheap candy I stuffed the rolls with silly putty, stickers, and a lollipop.  Ok, in the interest of full disclosure there was also a piece of cheap candy.  Avery helped stuff the rolls and handed them out to her friends at the meet.  It was a fun way to show her team spirit and surprise her friends.  Seriously, what kid (or adult for that matter) doesn’t like to open presents?


Add some ribbon and stickers and Voila!


Spirit Sticks up close


Halloween Cocktails

It’s almost Halloween and while I am sad that neither of my kids want me to make their costumes (are we past that age already?!), I have another project to throw my efforts into.  Cocktails!!  Last year we hosted a costume party for lots of friends and their children.  It was chaos.  Fun, but crazy.  This year we thought it would be a different kind of fun to have an adults-only party.  Adults only means I get to pick out some fun drinks.

I’ve been scouring the web and pinterest for some ideas, but after several taste tests (my job is so difficult) I have adapted the recipes to fit my palette and my guests tolerance level 😉

The plan is to hire a bartender and offer 3 custom cocktails and beer and wine.   Before unveiling the final three, take a look at some of the amazing concoctions I found during my search:

These use black vodka. I couldn’t find it at my local liquor store, but it looks so cool!

Bloody Cosmopolitan

Blood Sucker Cocktail

Candy Corn Martini

Black Devil Martini

Sinister Cider

Punch anyone?


and the winners are……………Well, I can’t say.  Tease, I know, but I need to save a few surprises for my guests!  Ultimately, all of the above look delicious, but very few have any mixers.  Unless I want the party on the floor before 10 o’clock I had to adjust the ratios to lighten things up a bit.  I kept with the flavors of the originals, but made them more party friendly.

Hope your Halloween is Spooktacular!


Mad Science Cake

There are so many great birthday party ideas out there that I can’t possibly use them all.  So, at least, with my cakes I can explore those themes that will probably never play out at my house.  This weekend was a Mad Science themed party.  The birthday boy was turning 5 and his mom and I decided on a beaker cake to compliment all the experiments they would be doing.  A friend had mentioned that she made a “smoking” beaker for her daughter once that used a can and dry ice on top of the cake and covered in icing.  An interactive cake?  Sounds awesome!  Here’s the result:

I used two 8″ cakes, two 6″ cakes, and one 4 ” cake to shape the beaker. I shaved them down to a tapered cylinder and cut out a hole in the top. Then, I inserted an empty sprinkles container and covered it all in buttercream, then fondant.

Birthday message spelled out on “spilled” chemicals spilling from a gumpaste test tube

gumpaste test tube

Empty container to be filled with dry ice and water to produce the “smoke” effect

How cute is the birthday boy?!  Looks like he likes his smoking beaker cake 🙂


Elephant and Buttons

Recently, I was asked to make a small cake for a baby shower.  I think my favorite part of cake decorating is the planning.  It’s so fun to come up with different ideas, lay out the colors, designs, shape, etc.  Since the mom-to-be didn’t have a theme I was given creative license to create whatever I wanted.  Sometimes too much freedom can be daunting.  The only thing I had to go on was that the nursery was blue, gray, and lime green and the sex of the baby is unknown.

So, here’s what I came up with.  After browsing pinterest I decided I wanted to make buttons to go on the cake.  I wasn’t sure exactly how to incorporate them, but I thought they were adorable.   I loved how the elephant came out on a previous cake, so I thought it would be cute to make another one holding a lime green balloon.